5.1 How to Create a Project
To create a new C# project:
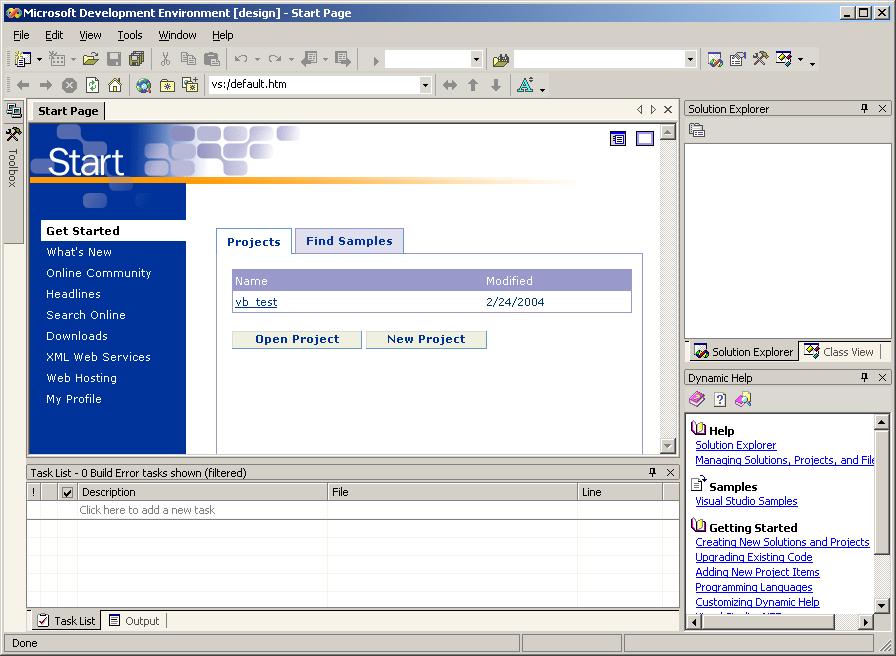
1. Start the Visual Studio .Net, (see Figure 5.1).
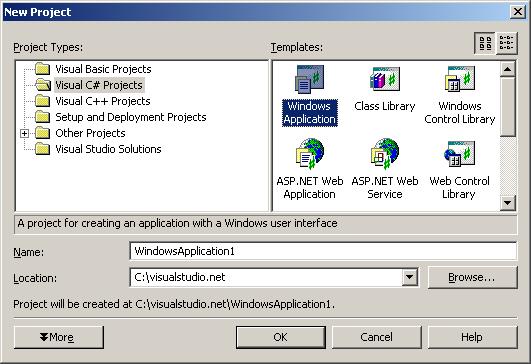
2. Click File � New Project command. The New Project dialog box is displayed (Figure 5.2).
3. Language and Templates: Highlight the Visual C# project folder in the Project Type list to display the templates that are available for C#. Then, highlight the Windows Application template (Figure 5.2).
4. Location and Name: Enter a name for the project and select the location for the project. A folder with the same name as the project is automatically added to the location you specify. We will use chap4 as the project name.
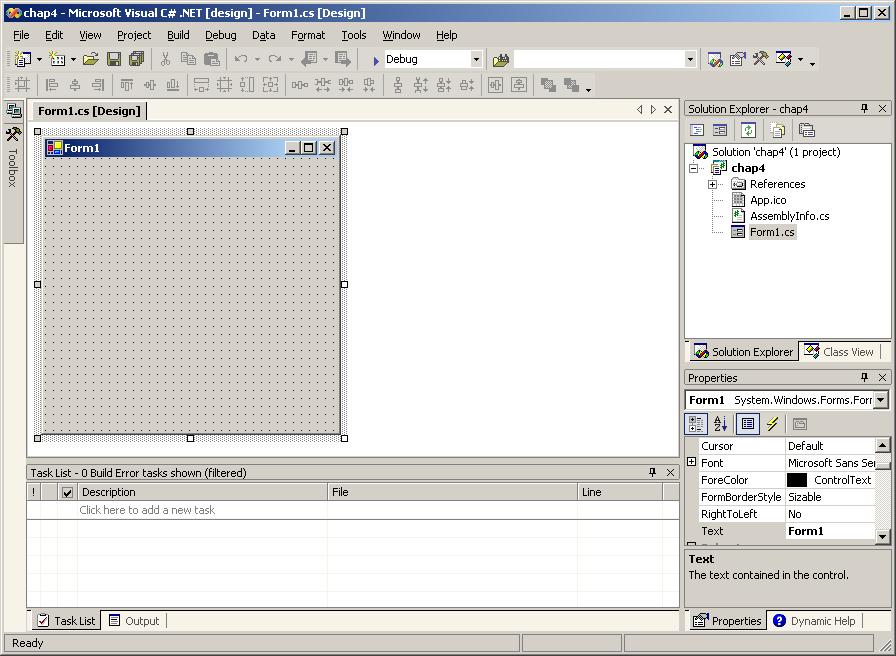
5. Click the �OK� button to start the new project (Figure 5.3).
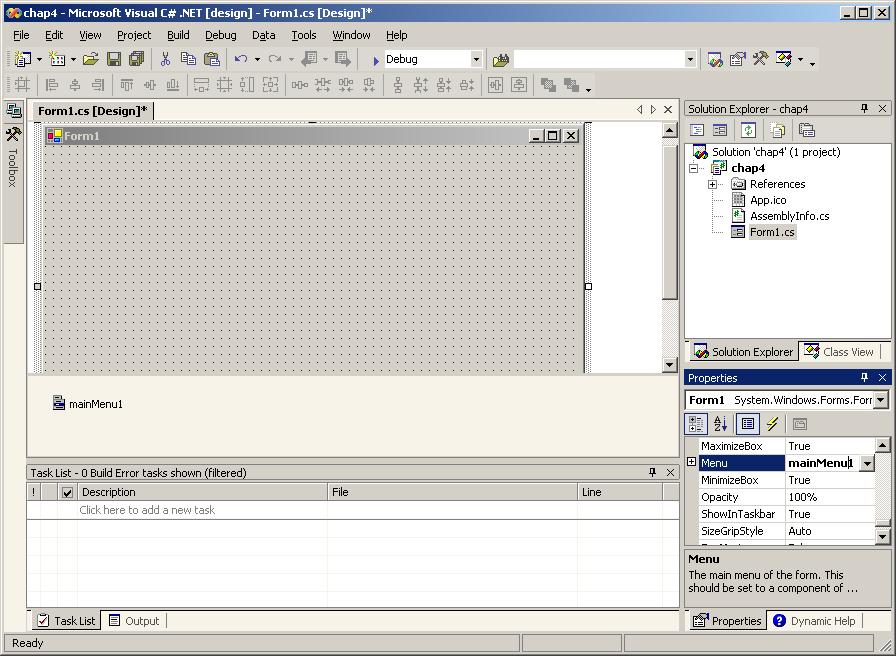
Now go to the property window and set (Figure 5.4):
-
Form1.text to �ImageFinder�;
-
Resize Form1.

Figure 5.1 Create C# Project.

Figure 5.2 Select Project Templates.

Figure 5.3 Form1.

Figure 5.4 Set Form1.Size.
![]()
Copyright (c) 2006 - 2007 Attrasoft. All rights reserved.